Seed starting for your summer garden is a very fun and satisfying thing to do. It lets you grow almost any type of plant from the ground up. I have been gardening for years now and can confidently say that I am a pro. Thus, capable enough to share the right way with you.
From picking out seeds to transplanting seedlings into your garden, I will walk you through everything you need. Furthermore, the tools required for you to ensure a smooth process will also be covered. Let’s start.
Selecting the Right Seeds For Your Summer Garden
Choosing the right seeds to start your garden with is the first step. Consider the climate, soil type, and space available in your garden. Different plants will do better if you start them inside and then transplant them, while others are fine being directly sown.
Nevertheless, here’s a table of some common seeds and how they should be utilized;
| Seed | Planting Method |
| Tomatoes | Indoor Starting |
| Beans | Direct Sowing |
| Beets | Direct Sowing |
| Peppers | Indoor Starting |
| Lettuce | Indoor Starting |
| Melons | Direct Sowing |
| Carrots | Direct Sowing |
| Radishes | Direct Sowing |
| Cauliflower | Indoor Starting |
| Squashes | Direct Sowing |
Tools You Need For Starting Seeds For Your Summer Garden
Before you begin planting, gather all necessary supplies. You’ll need seed trays, soil, labels, water, and a source of light. Here are more detailed information about the important ones only;
Seed Trays: Select trays or containers that have proper drainage. Nevertheless, commercial seed trays, egg cartons, or even disposable cups with holes punched through the bottom will work.
Soil: Use a fine, well-drained seed starting mix. However, do not use garden dirt, as it can carry disease and is often too heavy for seedlings.
Labels: Prepare some labels for each type of seed you are planting to make sure there is no confusion after. Nonetheless, you can use waterproof markers and labels.
Pre-Moisten the Soil
Pre-moistening the soil before seed planting is essential. Dry soil prevents water from seeping in where the seedlings need the most water. Here’s how you can moisten the soil;

Mix water with the soil and mix until it is like a cake – moist but not dripping.
Planting the Seeds
Here are the steps that you need to follow for proper planting of seeds;
Step 1: Tamping the Soil
Push lightly on top of the soil to remove pockets of air that steal vital nutrients away from seedlings. Additionally, before planting your seedlings, lift up the tray and tap it on a hard surface to settle the soil without being too compact.
Step 2: Creating Holes
Lay the seeds in very shallow holes. As a general rule, the depth should be around twice its diameter when seeding. Nevertheless, you can create holes using a pencil, chopstick, or the back end of a sharpie.
Step 3: Seeding
Place the seeds into the holes. If the germination rate is low, plant multiple seeds per hole and thin them out later if necessary.
Step 4: Covering Seeds
Wrap the seeds with a thin coating of soil to distribute them for even germination.
Watering and Lighting
It goes without saying how important watering and lighting is for plants to grow. Nevertheless, let’s check out how you need to maintain watering and lighting in a summer garden.
Watering
Gently water the soil to avoid displacing seeds. You should use a spray bottle or fine nozzle watering for this. These worked best for me. Furthermore, remember to water the soil regularly without soaking it. Once seeds germinate, decrease watering to promote root growth.
Lighting

Your seedlings will require 8-10 hours of light per day. However, natural light from a south-facing window might not be enough. Nevertheless, use grow lights or fluorescent lights placed close to the seedlings to stop them from becoming leggy (tall and weak).
Maintaining Seedlings
Your job isn’t over just by planting these seeds. Maintenance is key to these. In this case, temperature and fertilizing are vital. Let’s check it out.
Temperature and Humidity
Ensure the area is warm and has a moist surrounding. Keep the soil temperature around 70-75°F (21-24°C) with a heat mat. Nevertheless, a humidity dome may hold in moisture, but make sure to allow proper ventilation so you don’t mold the plants.
Fertilizing
Once seedlings develop their first true leaves, begin feeding them with a diluted, balanced fertilizer to promote healthy growth.
Hardening Off
Before transplanting seedlings to your garden, they need to be hardened off. This process adjusts them to outdoor conditions. Here’s how you do it;
- Gradual Exposure: Begin by setting seedlings outside in a sheltered location for just two hours each day, progressively increasing the time over 7-10 times.
- Protection: When you first plant them, make sure to protect these seedlings against direct sunlight and strong winds.
The Transplanting Process
Your seeds are now ready to go and rock the outdoor world. Here’s how you do the transplanting;

The Timing of Transplantation
Seedlings should be transplanted after there is no longer the risk of frost. Furthermore, you need to ensure transplantation after the soil has warmed up.
Planting
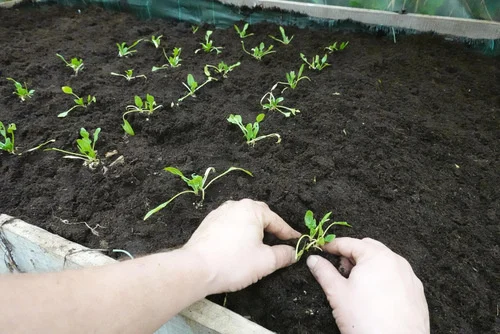
Make holes in your garden bed, put the seedlings you’ve just grown using a ruler, and fill with soil over the roots. Furthermore, when planting, water them well to give their roots a chance.
Enjoying Your Garden
If you know how to take care of it and give it proper attention, the seedlings shall grow beautifully. With the methods I mentioned above, you will only see strong plants that would be rich in productivity.
Furthermore, using these tips, you will be able to start seeds outdoors for your summer garden and begin planning the delicious seasonal harvest. Happy Gardening!


